| COEN | |||||||||||||
|---|---|---|---|---|---|---|---|---|---|---|---|---|---|

| |||||||||||||
| Resistances: | |||||||||||||
| |||||||||||||
 |
Creep around COEN
"The mid-boss COEN is blind, relies on sound to attack, so if you don't make noise, it won't know where you are! With Crouch Mode, it's pretty easy to beat it. Just watch out for its howl, as it'll locate you from the echo: crouch and run!" |
COEN is the first mid-boss the player will encounter in Let It Die. He represents the D.O.D. ARMS Faction and will drop D.O.D. ARMS Faction Metals.
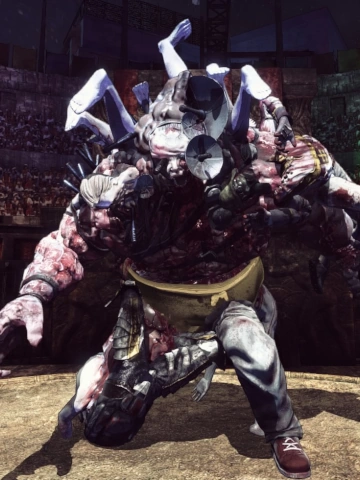
Called "Flabby" by Uncle Death, COEN becomes one of the player's most reoccurring foes. While he may seem like a pushover in his first encounter, in later floors he can be deceptively powerful and should not be underestimated. COEN is the first member of the "3 SHOCKS TERROR", a group of mid-bosses created as biological experiments by Professor Terada.
Lore
- “This tower was once used as a research facility by Professor Terada, the world's leading scientist behind super soldier research. As a result of many experiments, he created many new biological lifeforms, but most notable are the "3 SHOCKS TERROR." Professor Terada believed that he could create stronger soldiers by simply combining humans together, resulting in these three monstrosities. One of these three is called "COEN." COEN is 9 feet 2 inches tall and weighs 1,960 pounds. He was created by combining multiple people into one. He was an unfinished experiment, and suffers from poor vision. However, this had led to him developing a supreme sense of hearing. Coen lets out a yell, and uses the vibrations of the sound waves produced to determine where things are around him. Also, he pulls out the dead bodies of those he has vanquished in the Tower, and swings them or throws them as weapons. COEN is extremely powerful and capable in combat.”
- — Mother Barbs
Uncle Death Quotes:
- "This floor feels really strange to me. You're not afraid, man? Woah, you're really brave, man." - 3F TAMATA.
- "I knew I knew I knew I knew, something bad was gonna happen... That thing there is what you call a middle boss!" - COEN boss fight, 3F TAMATA.
- "Nice work, man! I knew you could take out that ugly piece of shit. Woah! You're gonna be a legend!" - Defeating COEN, 3F TAMATA.
Uncle Death Mail:
Dear Senpai,

Sorry to bother you again.
Um, about the flabby mid-boss...
Seems there's more than one.
They're actually mass-produced.
I don't know when or where
you'll encounter them again,
though. Yeah, that's not much help, I know.

This is you we're talking
about here, Senpai, so I
know you'll be just fine.
I feel it in my bones!
Looks like there are other
mid-bosses lurking about,
though. A chilling prospect!

Catch you later!
Dear Senpai,

Nice work with that Mid-Boss!
That thing was weird, huh? I
mean, what's with that tail?
Now, according to rumors, that
flabby Mid-boss and the rotting
girl one got a romance going on,
and somehow a child was born
from the Bridging Mid-Boss. That
child was that tailed Mid-Boss.
Yeah, I have no idea what the
hell that means either. Ha ha!
Anyway, there are some weird
things in the world.

Anyway, you defeated it, so
kudos, Senpai. I'll keep rootin' for ya!
Quests
| No. | Difficulty | Name | Category | Detail | Reward | Repeat Reward |
|---|---|---|---|---|---|---|
| 061 | ★ | Hunting COEN #001 | Destroy | Defeat COEN. | ||
| 062 | ★ | Hunting COEN #002 | Destroy | Defeat COEN x3. | ||
| 063 | ★★★ | Hunting COEN #003 | Destroy | Defeat COEN x1 in OSHIMI. | ||
| 064 | ★★★★ | Hunting COEN #004 | Destroy | Defeat COEN x3 in NITANDA. | ||
| 078 | ★★★★ | Hunting 3 SHOCKS TERROR #001 | Destroy | Without returning to the Waiting Room: Defeat the 3 Shock Terrors COEN, JIN-DIE, and GOTO-9, along with U-10. |
3F TAMATA
|
| ||
| Lv. 1 | 250 HP | |
|---|---|---|
| 250 EXP | 70 ABP | |
| Drops | ||
|
||
Strategy
As the first mid-boss you face, COEN can be defeated with pretty much anything, even just your Fists with a naked Lv.1 Fighter. With only 250 HP, he has less HP then you do. Though obviously, fighting bosses with Weapons and Armor is still a good habit to get into. The most important thing to note is something Meijin also points out in his tip: COEN is blind. While crouching or standing still, you will not make any noise, so COEN will be unable to hear you. This makes avoiding a lot of his attacks trivial, and he can be defeated with a simple "Hit & Run" strategy; attack COEN during an opening, then sneak away and wait for another. Defeating this boss will unlock Quests from Naomi Detox in the Hated Arcade, as well as allowing some previously locked floor gates to be opened.
As for armor, you may not have begun crafting your own at this point (though you should start very soon), but for now, you can make do with whatever you find off the ground. Worth noting is that any weapons or armor you find in the Tower will only have about 1/3rd or less of their full durability, meaning that they'll be weaker and break sooner. Gear that you R&D yourself and buy from Choku-Funsha will have full durability, which should last you much longer. But for this fight, it won't matter too much - if you're really concerned, just try and wear something in each slot.
While COEN may not put you in much danger, it's still important to understand when you should get your hits in, as you'll be able to beat him without ever taking damage. COEN doesn't have any ranged attacks here, so you'll have to be within melee range for him to hit you. As such, he is susceptible to any ranged attacks of your own. If you've picked up a Fireworks Launcher, Glinty Magnum or Robber Crossbow, they can be great assets in this fight. If you're using the Magnum, you'll be able to aim at COEN's face for bonus Headshot damage. Otherwise, you may want to lock on (L3 or T) to make sure your shots hit, though you don't need to stay locked on the entire fight. The Buzzsaw Knuckles Rage move is a ranged attack as well, shooting saws in a straight line. Crouch around him, then whenever COEN stops to attack, you'll be free to land hits on him using any of these weapons.
If you don't have or don't want to use any ranged options, then you will have to time your hits a bit more carefully using melee. You have openings to hit him whenever he finishes one of his attacks (the attacks are described in more detail below), but you should always try and attack him from the back. Every single enemy in the game will take more damage being hit in the back instead of the front. As well, COEN has to face you before doing any of his moves, so making him turn around can give you an extra second of time to react. The most important things to understand when trying to melee him is your own weapon's speed, and to not get greedy. You could stand behind him and spam attacks, but COEN will react eventually with an attack of his own. The safest way to fight him is to get only 1 or 2 attacks of your own in, then back off and wait for another opportunity to hit. If your weapon is slow, you'll probably only have enough time to get 1 hit in safely, but faster weapons may be able to get 2. After your hits, back off and wait for COEN to whiff his next attack before striking him again. You can roll away from him to get distance, but keep in mind that this game is no Dark Souls - there are no invincibly frames on rolling, so to avoid attacks, you can't roll through attacks, you have to move far enough away. If you Rage Meter is filled enough, a Rage move to his back can do heavy damage and make short work of COEN.
While not as necessary for this fight, Beasts, Shrooms and Decals will be helpful as well. Beasts or Shrooms can always be used for healing, though they should be grilled in a fire for their effects to be made stronger. There should be a few fires somewhere else on COEN's floor, otherwise, there is a permanent fire in the brazier next to the Mushroom Club in the Waiting Room. You'll probably only have found Frogs, Rats and Heartshrooms by now, but they'll do the job just fine. Splattershrooms provide a large secondary healing effect, which will fully heal you at this stage of the game, though they spawn less frequently. Yogashrooms can also be used, but make sure COEN can't hear you before you eat one. Their effect can be canceled at any time by opening the menu. Throwing Frongus or Fluffy Fungus will have no effect on COEN. Throwing a Boomshroom or Doomshroom will work, though COEN will only take 5 HP damage each Poison tick. Despite that, he has low enough HP that a single cooked shroom will eventually take him out.
The real go-to shrooms for fighting bosses are Crushrooms, Toughshrooms, and to some extent, Mouseshrooms. Crushrooms give you 50% more damage, Toughshrooms have you take 50% less damage, and Mousehrooms (from killed Rats) can give you Rage bars if you plan on using Rage moves on the boss. If you eat these right before you start the fight, they can go a long way in making any boss fight more manageable. You might even consider bringing extra in case the effects run out. Remember to cook them for increased effectiveness.
Working with Decals is always going to be different for each player, depending on what they pull from the Premium Kill Coin Stew, but there are a few non-Premium decals sold for Kill Coins at the Mushroom Club that everyone will have available. At this stage of the game, consider buying Dumbbell or DIY Enthusiast. Mosquito may seem nice as it can restore HP, but you'll probably only be healing 1 HP per hit, making it very slow recovery. Dumbbell is just a flat 7% ATK buff, which is good no matter what. DIY Enthusiast is 20% DEF if you're wearing a set of D.O.D. ARMS armor. It doesn't have to all be from the same armor set, each piece just needs to be D.O.D. ARMS. Once you find Blueprints and craft armor for a piece to wear in each armor slot, you should highly consider using this decal. But try and bring backup pieces of armor along in case one breaks early. Once your Grade 1 Fighter reaches Lv. 25, you can use the small amount of Bloodnium from Splattershrooms to get a second decal slot, so you should use both of these decals.
Farming
COEN is the main source of ![]() D.O.D. ARMS Blue Metal. But despite how early it can be obtained, there are hardly any early-game R&D recipes that use it, with it mostly being used in gear at Tier 3 or 4. It is nevertheless one of the easiest metals to obtain, as COEN's boss room is always directly to the right of the 3F TAMATA elevator once you step off, and by the point you're farming him, COEN will likely die in a single hit. If you're looking for more Blue metals, TAMATA is also a Trap room floor, meaning that elsewhere on the floor, there's a room with a Gold chest that contains a Faction metal, which will trap you in the room with Screamers once you open it. You will have to return to the Waiting Room to respawn both COEN and the Trap room chest.
D.O.D. ARMS Blue Metal. But despite how early it can be obtained, there are hardly any early-game R&D recipes that use it, with it mostly being used in gear at Tier 3 or 4. It is nevertheless one of the easiest metals to obtain, as COEN's boss room is always directly to the right of the 3F TAMATA elevator once you step off, and by the point you're farming him, COEN will likely die in a single hit. If you're looking for more Blue metals, TAMATA is also a Trap room floor, meaning that elsewhere on the floor, there's a room with a Gold chest that contains a Faction metal, which will trap you in the room with Screamers once you open it. You will have to return to the Waiting Room to respawn both COEN and the Trap room chest.
If you're after ![]() D.O.D. ARMS Green Metal, you're going to have a harder time. It can't be found in Max's Area (1-10F) at all, except on Wed / Fri / Sun at the 3F OMOKI shop. Green metals start to appear in Jackson's Area (11-20F), but there is no COEN in that area to drop it. As such, you'll have to rely on the Trap room chests or Hater drops to find it. More details can be found on the page for the metal.
D.O.D. ARMS Green Metal, you're going to have a harder time. It can't be found in Max's Area (1-10F) at all, except on Wed / Fri / Sun at the 3F OMOKI shop. Green metals start to appear in Jackson's Area (11-20F), but there is no COEN in that area to drop it. As such, you'll have to rely on the Trap room chests or Hater drops to find it. More details can be found on the page for the metal.
Attacks
- Sonar Wave — COEN will yell, creating a circular sonic wave that quickly grows until it touches you, though it deals no damage. While not a typical "attack", COEN will always start the fight with this move in order to locate you. Being touched by this wave will leave behind an afterimage of your Fighter at the spot you were standing, which COEN will rush over to. However, COEN relies on sound, and you will not make any noise while crouching or standing still, leaving this move as COEN's only way to find you. Staying silent will cause COEN to blindly do one of his attacks, then an Arm Swing, followed by him taking a few steps and looking around before letting out another Wave. Due to this, you cannot stay hidden from him forever, though it takes COEN a long time to fire off another wave, and even then, his follow-up attacks are easily dodged.
- Double Hit — COEN will smash the ground in front of him twice in quick succession, first with his Right arm, then with his Left. If COEN hears you around him, he will try and rotate himself to hit you with the second hit, even if you're behind him. The second hit does slightly more damage than the first. A very common move from COEN, as he likes to run up to you and attempt to use this move. If he can't hear you, he will often use this move and smash in random directions. It can be avoided by simply moving away from him, as the move doesn't cover much ground. After the second hit, he'll stay with his Left fist on the ground for a moment, giving you an opening to attack.
- Ground Pound — This move is 4 hits in total. COEN will do a small hop, then land and punch the ground very quickly with his Right and then Left fist, which each crack the floor and create a small AoE shockwave. He will hop again and punch with his Right fist, but will delay about half a second before making the final punch with his Left. Being caught in any of these hits will throw you backwards onto the ground. If you're standing very close to COEN when he starts this move, it's possible to get hit from the first two strikes simultaneously due to how fast he does them. The third hit of this attack appears to do the most damage. After this move, COEN will stand back up and stretch his shoulders, giving you a small opening to strike back. If you see COEN about to perform this move, it is best to keep your distance until he's done, but prepare to move in after the 4th hit.
- Arm Swing — COEN will only do this attack if he can't hear you. He will use another move randomly first, then follow it up with this Arm Swing attack. COEN will swing his Right arm behind him, then his Left, which will hit you if you're positioned very close to him. After this attack, he will walk around idly for a few moments before using another Sonar Wave. If you are trying to sneak up on him to get a hit in, you will have the most time after he finishes the Arm Swing.
- Charge — At this floor, COEN will only start using this move when he reaches low health. He does a very subtle animation where he focuses on you, then rushes, trying to crash into you. If he hits, you will take heavy damage and be knocked over, but if he misses, COEN will slam his head into the wall and be stunned briefly, giving you an opening to attack. COEN will run pretty quickly, so it's important to be paying attention to what he's about to do, and not to stand directly facing him.
- If you are not within melee range, COEN will constantly run up to you and attempt to use one of his attacks. You can try and run, but he will chase you indefinitely until he gets close enough. However, the time it takes to actually start the attack will give you time to move away.
- After being hit by any of COEN's attacks, he may throw his arms back and yell at you as a taunt. He may stop doing this at lower health.
- You may have noticed that COEN always punches with his Right arm first. As such, you can be a little safer by staying on his Left side, a.k.a. your Right.
26F OSHIMI
 | ||
| Lv. 6 | 11400 HP | |
|---|---|---|
| 600 EXP | 74 ABP | |
| Drops | ||
|
||
Strategy
This COEN is the same as COEN on Floor 3, with vastly more health and higher attack power. Bring a large supply of high-damage weapons. If using ranged weapons, the pitching machine and assault rifle work well, especially if you pair this with Stingshrooms or Dragonshrooms. If using melee weapons, crouch-walk to a distance, let him use his echolocation, and hit him when he's recovering from a one-two smash or a running charge. Get one or two shots in, then roll away. The katana's R1 combo attack works fairly well because of the range of the thrust, as does the L1/R1 attack for the spear.
Stingshrooms and Transparungus or Slowmungus can be used to make this fight easier, if needed.
Attacks
This version of COEN gains new attacks; he uses the same attacks as the COEN on Floor 3, but this version can also charge at any time, no matter how much health he has.His new attack is he can run and stop you. This will reduce you half hit point!
Farming
34F NITANDA
| ||
| Lv. 10 | 20000 HP | |
|---|---|---|
| 800 EXP | 76 ABP | |
| Drops | ||
|
||
Strategy
For this fight, make sure to bring a hefty supply of mushrooms: Stingshrooms, Slowmungus, Guardshrooms if you have any, and Lifeshrooms. COEN can easily kill you in one shot on this floor, so not allowing him to attack is the best strategy for surviving.
Mid- to long-range weapons with pure ![]() Piercing damage are your best bet for weapons. Since War Ensemble offers quite a range of gun options, it may be worthwhile to equip Drill Sergeant decals. Steel Axes deal good damage as well, if you prefer using a Striker. With appropriate mastery and item levels, plus the Stingshroom strategy, each axe hit should do about 500-1000 damage.
Piercing damage are your best bet for weapons. Since War Ensemble offers quite a range of gun options, it may be worthwhile to equip Drill Sergeant decals. Steel Axes deal good damage as well, if you prefer using a Striker. With appropriate mastery and item levels, plus the Stingshroom strategy, each axe hit should do about 500-1000 damage.
Attacks
COEN gains two new attacks on this floor:
- He uses a pair of bodies as flails. He first hits the ground with a body held in his right hand, and then with a body in the left hand. This attack is similar to the one-two punch from Floor 3, but with a greatly extended range.
- He throws bodies at you. This generally happens if you make noise while far away from him. COEN has an infinite supply of bodies; after throwing one, he can simply pull another out of his back.
Farming
40F FUTAGI
| ||
| Lv. 11 | 10500 HP | |
|---|---|---|
| 300 EXP | 76 ABP | |
| Drops | ||
|
||
Strategy
Attacks
COEN MK-2
| |||
| Lv. 50 | 67000 HP | 5000 EXP | |
|---|---|---|---|
| Lv. 51 | ? HP | 5100 EXP | |
| Lv. 52 | ? HP | 5200 EXP | |
| Lv. 53 | ? HP | 5300 EXP | |
| Lv. 54 | ? HP | 5400 EXP | |
| Lv. 55 | ? HP | 5500 EXP | |
| Lv. 56 | ? HP | 5600 EXP | |
| Lv. 57 | ? HP | 5700 EXP | |
| Lv. 58 | ? HP | 5800 EXP | |
| Lv. 59 | ? HP | 5900 EXP | |
| Lv. 60 | ? HP | 6000 EXP | |
| 70 ABP | |||
| Drops | |||
|
|||
Strategy
Coen returns in this mark two variant with not only a different skin, a small caged arena, but also utilizes all his learned attack moves at levels that are threatening and scale the higher you are in your tengoku climb. Coen will always start the engagement with a Sonar Wave, this time not only does it track where you are, it will incur damage (and potentially kill you in one shot. There are a few ways to counter this sonar wave, but primarily you can cancel the sonar wave if you do enough damage to Coen before it hits you. This can normally be cancelled out with ranged attacks or a rage move from a melee weapon. Recommend Kamas, M2G knife or Spirit Lance (spear) / Belphegor rage move to cancel out Coen's sonar wave. However eventually the requirements to out damage him before the sonar wave hits you (and possibly kills you) may be too much of a risk to go on the offensive, and you may find yourself requiring to block (at risk to still die or take incredible damage) or time a perfect block (which is fairly difficulty).
Once you're past the Sonar Wave attack, the fight relaxes a bit and is fairly manageable, if you follow the same strategies as the lower Coens. Apart from being caught in Coen's attacks, the only thing to be careful about is Coen's body flails being thrown at you, and if he loses track of you, possibly another Sonar Wave attack.
Attacks
- Sonar Wave — COEN will yell, creating a circular sonic wave that quickly grows until it touches you, though it deals no damage. While not a typical "attack", COEN will always start the fight with this move in order to locate you. Being touched by this wave will leave behind an afterimage of your Fighter at the spot you were standing, which COEN will rush over to. However, COEN relies on sound, and you will not make any noise while crouching or standing still, leaving this move as COEN's only way to find you. Staying silent will cause COEN to blindly do one of his attacks, then an Arm Swing, followed by him taking a few steps and looking around before letting out another Wave. Due to this, you cannot stay hidden from him forever, though it takes COEN a long time to fire off another wave, and even then, his follow-up attacks are easily dodged.
- Double Hit — COEN will smash the ground in front of him twice in quick succession, first with his Right arm, then with his Left. If COEN hears you around him, he will try and rotate himself to hit you with the second hit, even if you're behind him. The second hit does slightly more damage than the first. A very common move from COEN, as he likes to run up to you and attempt to use this move. If he can't hear you, he will often use this move and smash in random directions. It can be avoided by simply moving away from him, as the move doesn't cover much ground. After the second hit, he'll stay with his Left fist on the ground for a moment, giving you an opening to attack.
- Ground Pound — This move is 4 hits in total. COEN will do a small hop, then land and punch the ground very quickly with his Right and then Left fist, which each crack the floor and create a small AoE shockwave. He will hop again and punch with his Right fist, but will delay about half a second before making the final punch with his Left. Being caught in any of these hits will throw you backwards onto the ground. If you're standing very close to COEN when he starts this move, it's possible to get hit from the first two strikes simultaneously due to how fast he does them. The third hit of this attack appears to do the most damage. After this move, COEN will stand back up and stretch his shoulders, giving you a small opening to strike back. If you see COEN about to perform this move, it is best to keep your distance until he's done, but prepare to move in after the 4th hit.
- Arm Swing — COEN will only do this attack if he can't hear you. He will use another move randomly first, then follow it up with this Arm Swing attack. COEN will swing his Right arm behind him, then his Left, which will hit you if you're positioned very close to him. After this attack, he will walk around idly for a few moments before using another Sonar Wave. If you are trying to sneak up on him to get a hit in, you will have the most time after he finishes the Arm Swing.
- Charge — At this floor, COEN will only start using this move when he reaches low health. He does a very subtle animation where he focuses on you, then rushes, trying to crash into you. If he hits, you will take heavy damage and be knocked over, but if he misses, COEN will slam his head into the wall and be stunned briefly, giving you an opening to attack. COEN will run pretty quickly, so it's important to be paying attention to what he's about to do, and not to stand directly facing him.
- If you are not within melee range, COEN will constantly run up to you and attempt to use one of his attacks. You can try and run, but he will chase you indefinitely until he gets close enough. However, the time it takes to actually start the attack will give you time to move away.
- After being hit by any of COEN's attacks, he may throw his arms back and yell at you as a taunt. He may stop doing this at lower health.
- You may have noticed that COEN always punches with his Right arm first. As such, you can be a little safer by staying on his Left side, a.k.a. your Right.
- Two Body Flails — Coen will pull two bodies from his.. body and act as his one-two punch however with greater reach and will also throw them at you. They are very quick in a small arena, have the possibility of catching you off guard.
TDM
Strategy
Attacks
Boss Fight Videos
| Floor 3 Boss Fight | Floor 26 Boss Fight | Floor 34 Boss Fight |
|---|---|---|
|
Video by Muntyness |